This week, our assignment was to build a browser-based application using responsive design so that we could transfer the application from our personal computers to a mobile device via a QR code.
First of all, here is the link to my application:
I really enjoyed this week’s assignment. Having learned to style my HTML code using inline style code, before CSS was even really a thing, I’d always used what I knew of inline style code and applied it to the CSS page of my sites doing a lot of guesswork… and often looking up the code I needed.
Man, was I REALLY surprised when I learned that CSS is box-based. This was *very* exciting to learn because I’ve often been frustrated with CSS and formatting, but never enough to take the time to learn what was at the root of my formatting issues. I spent about 10 hours over the past few days learning about flex boxes, padding, margins, and, even, the difference between the Standard CSS box model and the Alternative CSS box model (which uses box-sizing: border-box.)
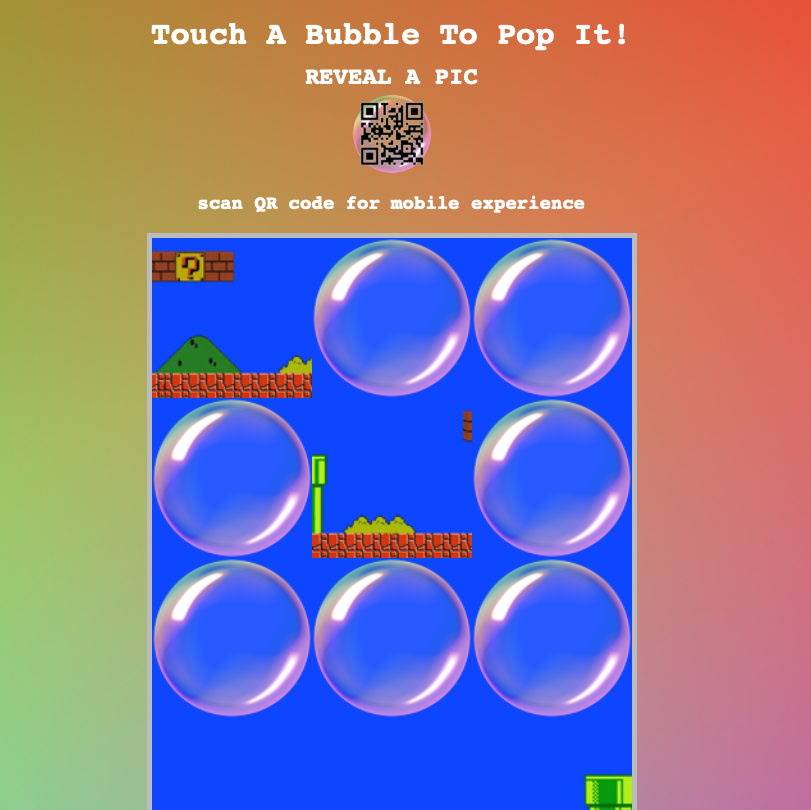
For my application, I used the wrapping feature to have ‘bubbles’ rise to the surface when you pop other bubbles. Among the bubbles are pieces of an image that, when combined, forms once you’ve popped all the bubbles. I used the onclick="remove(this)" method to make the bubbles disappear. I was able to figure out the function’s code, but would have spent much long figuring out the whole ‘this’ part of it were it not for this post on StackOverflow. I realize that the example in our notes showed a (this) in our examples, but I, often, have a hard time telling whether code is an example or code.
My initial concept for this was just to have bubbles rise to the surface, however, it was difficult to create an “opening” on the top level (essentially, I had the image pieces on top and four columns across… in the fourth spot, the bubbles would bubble up.) Because of the way the wrapping works, the effect was quite lack luster. I tried anchoring the image pieces, but always got the last item on the bottom row on the other side of the container… far from creating the illusion of ‘flow’. I looked for a way for the items to ‘snake’ around, but couldn’t find it.
Another issue I had was using the viewport code for the mobile device. I found that adding it restricted my zoom in and out abilities and, ultimately, not having it allowed iOS to better manage the zooming (and usability) of the application. (I’d be curious if this is different for other operating systems, such as Android.)
If you’re interested in looking at the code in my GitHub Repo, here’s the link:
BubblePop – Pop ‘Em! – GitHub Repository
Enjoy!
PART TWO – XO KissyFace
After I finished with the previous browser-based application / QR code example, I kept wondering if I could code my original thought–a version of Tic-Tac-Toe. I wanted to see how using images as content vs text was different.
One thing I did learn was it’s great to use ‘vw’ (percentage of viewing width) to help keep everything in scale.
I created the boxes and their contents… when you click on the boxes they cycle through “X”, “O”, and “😘” (which is often used in lieu of XO in text messages.) On the center square, there is a 4th option, the QR code shows up and lets you know you can scan to play on your mobile device.
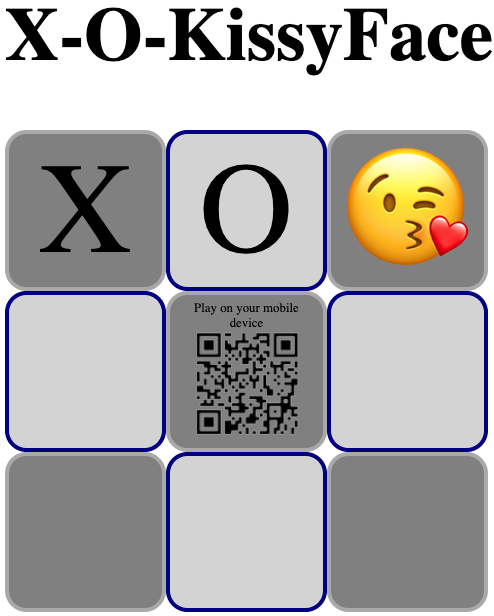
I didn’t program in the logic, but that really isn’t what this was about for me. I wanted to see if my understanding of how flex display works. I’ll be honest, I confuse where which combinations of inline-flex, inline-block, row-reverse, wrap-reverse, flex-flow, etc go… as well as which ones are real and which ones I’m mixing up. I didn’t have to reference a lot–though, I have the darnedest time with alignment stuff. That said, I JUST finished my previous piece not that long ago, so a lot of it was fairly fresh in my brain.
Hope you enjoy this one as well. Here you have:
Here is the code on GitHub:
Tic-Tac-KissyFace – Browser Based Application – GitHub Repository

